How to Repair a Hole in a Plasterboard Wall
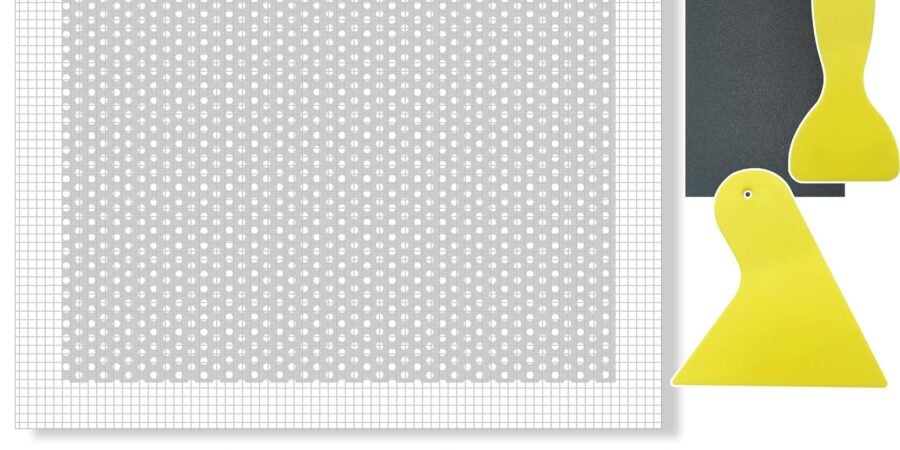
Door handle through the wall? Over-enthusiastic furniture moving? If you’re asking how do I repair a hole in a plasterboard wall, the method depends entirely on the size — a coin-sized dent and a football-sized hole need completely different approaches.
All three methods below give invisible results if you take your time with the finishing. The secret isn’t the filling — it’s the sanding and painting afterwards. Here’s each method step by step.
How Do I Repair a Hole in a Plasterboard Wall? Small Holes (Under 5cm)
Nail holes, small dents, rawlplug holes — the easy stuff:
- Remove any loose material and dust the hole out.
- Push fine surface filler (not general-purpose — it’s smoother) firmly into the hole with a filling knife, slightly overfilling.
- Let it dry completely (it shrinks as it dries — that’s normal).
- Apply a second thin skim if needed, then sand smooth with 120-grit paper.
- Spot-prime with watered-down emulsion, then paint.
Ten minutes of work plus drying time. The mistake everyone makes is painting too soon — filler that’s even slightly damp will bubble the paint.
Medium Holes (5–15cm): The Patch Method
- Cut a neat rectangle around the damage with a padsaw — clean edges are easier to patch than ragged holes.
- Fit timber battens behind the hole: slide two lengths of batten through, screw them to the existing plasterboard above and below the hole. These are what your patch screws to.
- Cut a plasterboard patch to fit the rectangle exactly (measure twice). Screw it to the battens.
- Tape the joints with self-adhesive scrim tape — this prevents cracks appearing along the seams.
- Skim with filler in two thin coats, feathering the edges wide so there’s no visible ridge.
- Sand, prime, paint. Run your hand over it — if you can feel an edge, sand more.
Materials cost: under £15 (offcut of plasterboard, battens, scrim, filler). Most DIY shops sell small plasterboard offcuts — ask at the timber counter.
Large Holes (15cm+): The Proper Patch
For big holes, the method is the same as medium but scaled up — with two differences:
- Find the studs. For large patches, screw the patch directly to the studs on either side rather than relying on battens alone. Much stronger.
- Consider a California patch for speed: cut the patch 5cm larger than the hole all round, peel the paper backing off the excess to leave a paper flange, butter the flange with filler, and press it into the hole. The paper flange bonds to the wall — no battens needed. Brilliant technique, worth learning from a quick video.
For holes bigger than about 30cm, or if the surrounding board is damaged/crumbling, replacing the whole plasterboard sheet section between studs is honestly easier than patching — cleaner result, less fiddling.
The Finishing: Where Invisible Happens
- Feather wide: spread filler 10–15cm beyond the patch edges in thin layers. A gradual slope is invisible; a sharp ridge catches light forever.
- Sand between coats with 120-grit, finishing with 180-grit for the final pass.
- Prime the patch — bare filler absorbs paint differently from the surrounding wall, causing flashing (a visible dull patch). A mist coat of watered-down emulsion seals it.
- Paint corner to corner: don’t just touch up the patch — paint the whole wall section between natural breaks (corners, door frames). Touch-ups always show.
- Light test: shine a light along the wall at an angle. If you can’t see the repair in raking light, nobody will ever notice it.
Prevention (Worth 30 Seconds)
Most plasterboard holes are door handles. A £5 door stop — fitted to the skirting or floor — prevents 90% of them. Hinge-pin stops (£8 for a pack) work where floor stops won’t.
For high-traffic areas (behind where chairs push back, kids’ bedrooms), consider chair rails or protective panels. And if you’re hanging heavy things near the repair in future, find the studs — the Which? DIY guides cover stud-finding well.
Plasterboard Repair: Pro Finishing Tips
- Feather the filler wide. Spread each coat 10–15cm beyond the repair. A gradual slope disappears; a sharp ridge catches light forever. Wide and thin beats narrow and thick.
- Sand with a light. Hold a work light at an angle to the wall while sanding — raking light reveals every imperfection your eyes miss head-on.
- Two thin coats beat one thick. Thick filler shrinks, cracks and takes forever to dry. Thin coats dry fast, sand easily and build a better finish.
- Prime before painting. Bare filler absorbs paint differently from surrounding wall — unprimed patches “flash” (visible dull spots). A mist coat of watered-down emulsion seals it.
- Paint wall-to-wall. Touch-ups always show, however careful. Paint the whole wall between natural breaks (corners, door frames) for an invisible repair.
- Caulk the edges. Where the patch meets skirting, coving or frames, a fine bead of decorator’s caulk gives the crisp professional line that separates good from great.
Worth Knowing
Feather filler wide and thin — 10–15cm beyond the repair in gradual layers. Sharp ridges catch light forever; gentle slopes disappear. Wide and thin beats narrow and thick every time.
- Sand with raking light — a work light held at an angle reveals imperfections your eyes miss head-on.
- Prime bare filler before painting — unprimed patches flash (visible dull spots) because filler absorbs paint differently.
- Paint wall-to-wall between natural breaks — touch-ups always show. Corners and door frames are your friends.
One Last Thing
The light test is the final judge — shine a work light along the wall at an angle. If you can’t see the repair in raking light, nobody will ever notice it. Feather wide, sand patiently, prime properly, paint wall-to-wall: that’s the entire secret of invisible repairs. And fit a £5 door stop so you never do it again.
- California patches (paper-flange method) are worth learning — no battens needed, brilliant for medium holes.
- Holes over 30cm, or crumbling surrounding board: replace the whole section between studs. Cleaner and easier than heroic patching.
You Might Also Like
- How to Improve Your Home’s EPC Rating Cheaply
- Best Way to Organise a Garage in a UK Home
- How to Stop Your uPVC Door From Sticking in Summer
Patch It Like a Pro
Repairing a hole in a plasterboard wall means matching the method to the size: filler for small, batten-and-patch for medium, stud-fixed patches for large. The invisible finish comes from feathered filler, proper sanding, priming, and painting wall-to-wall. Under £15 in materials, an hour or two of work, and a £5 door stop to stop it happening again.

